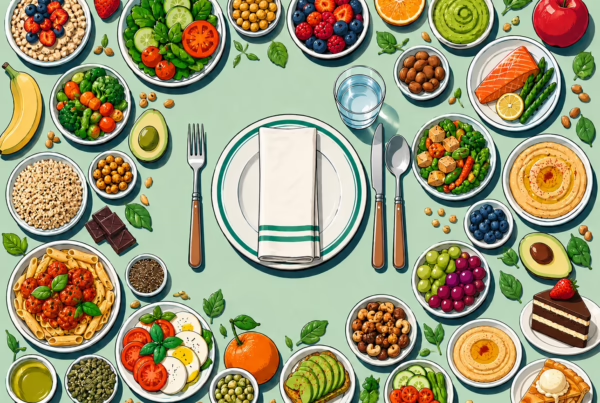
Fuel your body, lift your mood, and keep things simple. That’s what the Recovery Kitchen is all about.
This colorful veggie wrap combines crisp fresh vegetables with creamy homemade hummus for a meal that is simple, flexible, and satisfying. The hummus adds rich flavor and protein, while seasonings like paprika, garlic, and cumin bring warmth and depth without overpowering the fresh ingredients. Recovery Kitchen recipes like this encourage balance, variety, and enjoying food in a relaxed and approachable way.
In the Recovery Kitchen, food isn’t about perfection, it’s about progress, comfort,
and rediscovering joy.
HOW TO MAKE A VEGGIE WRAP W/ HOMEMADE HUMMUS

Ingredients FOR VEGGIE WRAP
- 8”-10” Tortilla
- Hummus ** See recipe for homemade hummus below
- Shredded Carrots
- Cucumber Strips
- Fresh Baby Spinach Leaves
Directions
- Make hummus ** See recipe for homemade hummus below
- Prepare the vegetables: wash the spinach leaves and pat dry, shred carrots and make cumber strips
- Warm the tortilla. A tortilla that’s been heated for 10–15 seconds in a skillet or microwave becomes softer and easier to fold without cracking.
- Spread a thick layer of hummus leaving about 1–1 1/2 inches around the edges
- Add the spinach leaves, carrots and cucumbers
- Tightly wrap up the tortilla, burrito-style. Read the TIP: HOW TO FOLD a TORTILLA
- Slice in half
How To Tips
These simple kitchen tips can help make preparing fresh, colorful wraps easier and more enjoyable. From shredding carrots and cutting crisp cucumber strips to filling and folding tortillas without tearing, these techniques are designed to build confidence in the kitchen while creating satisfying meals with flexibility, balance, and flavor.
HOW to Shred Carrots
Here are 4 options to shred carrots:
- Box Grater (Best for Salads/Baking): Place the grater on a cutting board or inside a bowl. Hold the carrot at its base and move it down the large-hole side, creating roughly 1-2 inch long shreds.
- Julienne Peeler (Best for Salads/Garnish): Use a julienne peeler to peel the carrot lengthwise, creating thin, consistent, matchstick-like strips.
- Mandoline (Best for Speed): Use the shredding/julienne setting to quickly create uniform shreds.
- Knife (Best for Larger Texture): Cut the carrot into thin planks, then cut those planks into thin strips
How to Make Cucumber Strips
- To cut a cucumber into strips
- Rinse the cucumber under water to clean
- Slice off both ends
- Peel the skin of regular cucumbers. English or Persian cucumbers have thin skin so no need to peel.
- Slice length wise & remove seeds if they are large
- Cut it into 2–3 inch segments, and then into flat planks, stacking them to slice into thin matchsticks (julienne) or wider sticks.
How to Fill a Tortilla– Burrito Style
- Warm the tortilla :A slightly warm tortilla is more flexible, making it easier to fold without cracking. Heat for about 10–15 seconds in the microwave Or warm briefly in a skillet over medium heat
- Don’t overfill the tortilla: It’s tempting to add lots of ingredients, but too much filling makes wraps difficult to roll and more likely to fall apart.
- Spread soft ingredients first: The hummus creates a “base layer” that helps hold vegetables in place.
- Keep wet ingredients controlled: Pat the vegetables dry so the wrap doesn’t become soggy.
- Cut vegetables thinly: Thin strips or shredded vegetables roll more easily and create a better texture in every bite.
- Layer ingredients in the center: Leave about 1–2 inches around the edges so you can fold the sides inward before rolling.
- Balance textures and colors: Combine crunchy vegetables like carrots or bell peppers with softer ingredients such as avocado or spinach for a more satisfying wrap.
- Season as you go: A pinch of salt, pepper, lemon juice, or herbs can make fresh vegetables taste much brighter.
- Roll tightly: Fold in the sides first, then roll from the bottom while gently tucking the filling inward to keep everything secure.
- To seal: (optional) Place seam-side down in a medium hot skillet for 1–2 minutes to seal (optional)
- Slice with a sharp knife: Cutting the wrap diagonally makes it easier to eat and shows off the colorful filling inside.
- Chill briefly before slicing (optional): Letting the wrap rest for 5–10 minutes helps it hold together, especially for packed lunches or party platters.
How to Fold a Tortilla– Burrito Style
- Warm the tortilla
A slightly warm tortilla is more flexible and less likely to crack.
- Heat for about 10–15 seconds in the microwave
- Or warm briefly in a skillet over medium heat
- Add fillings in the center
Place ingredients in a horizontal line across the lower middle of the tortilla.
Try not to overfill. Leave:
- About 2 inches on the sides
- About 2 inches at the bottom
- Folding Steps
This helpful TikTok video demonstrates one way to fold a warmed tortilla burrito-style, even though the filling shown is different from our veggie wrap recipe.
- Fold the bottom up: Bring the bottom edge up and over the filling tightly. Press down filling.
- Lower the bottom edge
- Fold in both sides: Fold the left and right sides inward like an envelope.
- Take the bottom and start rolling upward tightly while gently tucking the filling inward.
- Optional finishing step
- Place seam-side down in a medium hot skillet for 1–2 minutes to seal
- Or wrap in parchment paper for easier eating

OTHER VEGETABLE FILL OPTIONS
- Yellow / Red Bell Pepper Strips
- Grated beets
- Thin Red onion Strips
- Pickled Onions
- Thinly Sliced Jalapeños pepper
- Avocado
- Arugula
- Cilantro
HOW TO MAKE HUMMUS

This creamy homemade hummus comes together in just minutes using simple ingredients like chickpeas, tahini, lemon, with optional spices and garlic. The result is smooth, bright, and full of fresh flavor. A high-speed blender creates the creamiest texture quickly, but a food processor works well too with a little extra blending time.
Ingredients for Hummus
Adding paprika, garlic, and cumin to hummus is a simple way to build deeper flavor without overpowering the classic chickpea and tahini base. Paprika adds warmth, color, and mild sweetness, while garlic brings brightness and savory depth. Cumin contributes an earthy flavor commonly used in Middle Eastern cooking that pairs naturally with chickpeas and tahini. Using garlic and cumin as optional ingredients also allows flexibility for different taste preferences while still creating a balanced, flavorful hummus.
- 1 15 oz can of chickpeas, drained and rinsed = 1 ½ cups of chickpeas
- ⅓ cup smooth tahini
- 2 tbsp extra-virgin Olive Oil
- 2 tbsp fresh Lemon Juice, plus more to taste
- 1 tbsp ground Paprika
- 1 small Garlic Clove -minced optional
- ½ tsp Ground Cumin optional
- ½ tsp Salt & Pepper to taste
- 2-3 tbsp ice cold water or as needed to blend

tsp = teaspoon
tbsp = tablespoon

Directions
- In a high-speed blender or food processor, place 1/2 the canned chickpeas, tahini, olive oil, lemon juice, garlic (optional), paprika, cumin (optional), and salt. Blend for about a minute.
- Add the rest of the chickpeas and process for another 2-3 minutes.
- Add ice cold water in small amounts, blending until you reach your desired consistency.
- Taste and adjust as needed with more salt and/or lemon juice.
- Set aside till ready to use

An Alternative Approach to Blending Hummus
- First mince the garlic with the lemon juice in the food processor or blender. Let rest for 2-3 minutes. It helps mellow the garlic’s sharp raw flavor.
- Next add the tahini with 2 tablespoons of ice-cold water. The ice-cold water helps make the hummus lighter in its consistency as well as lightening the color of the tahini to a pale ivory color.
- Add the rest of the ingredients and blend until you reach your desired smoothness, adding more ice cold water if necessary.
Tips
These helpful tips answer common questions about whether you should use a blender or food processor, remove the chickpea skins or not, and offer simple ways to improve flavor, texture, and storage of your homemade hummus.
Blender vs Food Processor Does it Matter?
A food processor is best for making hummus, but a high-powered blender will work s well. Be sure to scrape the sides down a few extra times as you make it. If you use a food processor to make the hummus, you’ll likely need to blend it a bit longer-up to a few minutes.
What is Tahini?
Tahini is a paste or butter made from hulled sesame seeds that are toasted and ground until they release their oils.
Note that NOT all tahini has the same flavor, texture, or quality.
What Tahini Brands Should I Consider?
Although there are many other brands out there that may be just as good, these brands have garnered very positive reviews.
- Mighty Sesame Co. Organic Tahini
- Soom Premium Tahini
- 365 by Whole Foods Organic Tahin
- Joyva Sesame Tahini
Do I Need to Remove the Skins From Canned Chickpeas?
It’s totally up to you but is not necessary.
- To remove the skins from canned chickpeas, drain and rinse the chickpeas well, then place them in a bowl of water.
- Gently rub the chickpeas between your hands or against a clean kitchen towel to loosen the skins.
- Many of the skins will float to the surface and can be skimmed off or poured away with the water.
- Repeat as needed until most of the skins are removed.
While optional, peeling chickpeas can create a smoother, creamier hummus.
Skip the Peeling: An Easier Chickpea Prep Method
- Drain and place the chickpeas in a medium saucepan.
- Add ½ teaspoons of baking soda.
- Cover the chickpeas with several inches of water and bring to a boil.
- Cook for about 15-20 minutes, until very soft and the skins begin to loosen.
- Drain in mesh strainer, rinse briefly under cool water, and set aside.
- No peeling needed.
Storing Hummus
Store hummus in an airtight container and refrigerate for up to one week. Freeze it, covered with a thin layer of olive oil, for up to one month.